
How to clean an oven safely and remove baked-on grease
Cleaning an oven properly is not just a domestic chore. In professional kitchens, offices with staff canteens, holiday lets, schools, clubs and small hospitality businesses, the oven is a point where hygiene, odour, food safety and energy efficiency meet. When grease is allowed to carbonise, the oven takes longer to heat, smoke appears sooner and every tray carries the risk of unwanted smells or residues.
This guide explains how to clean an oven safely and efficiently, choosing the right degreaser, cloths, brushes and protective equipment for each level of soil. The aim is simple: remove baked-on grease without damaging enamel, seals, glass, stainless steel or heating elements.
Why oven cleaning matters in a professional environment
An oven with old grease inside is harder to control. It may smoke before the correct temperature is reached, transfer odours to food and force staff to repeat cleaning at the worst possible time: just before service, a booking or an inspection.
For a business, the real cost is not only the product used. It is the labour time, the downtime of the equipment, the risk of complaints and the impression given when the door glass, handles or surrounding stainless steel look neglected.
Keyphrase: how to clean an oven safely
The safest method depends on three variables: the type of oven, the level of grease and the surface being cleaned. A light maintenance clean after use is very different from removing months of carbonised grease from trays, racks and corners.
As a rule, use the least aggressive process that will solve the problem. Start with mechanical removal of loose residues, then apply the correct oven cleaner or professional degreaser, allow enough contact time and rinse thoroughly. More product does not usually mean a better result; better contact time, temperature control and agitation do.
Products and tools you need before starting
Prepare everything before applying any chemical. This avoids leaving a strong degreaser drying on the surface while somebody searches for gloves or cloths.
| Need | Recommended option | Why it matters |
|---|---|---|
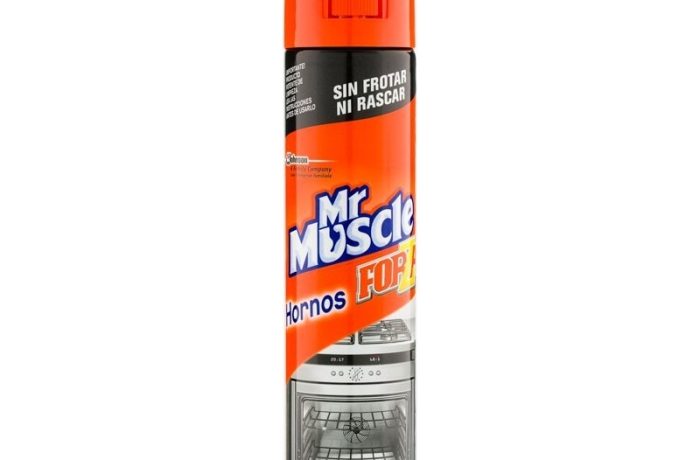
| Heavy oven grease | Mr Muscle oven cleaner spray | Designed for baked-on grease inside ovens and grills. |
| Griddles and very greasy surfaces | Margras concentrated griddle degreaser | Useful when grease is dense and heat-related, following label directions. |
| General exterior cleaning | ECO-PQ eco-friendly degreaser | Good for surrounding washable surfaces and routine degreasing. |
| Final finish | PURITTE PU MICRO PREMIUM cloths | Helps leave glass and stainless steel cleaner, with fewer fibres and marks. |
| Hands and forearms | cleaning gloves | Protects skin from alkaline cleaners, grease and hot residues. |
For a full cleaning kit, combine professional degreasers, microfibre cloths, soft brushes and general cleaning tools. Keep these items separate from cloths used in dining rooms, toilets or front-of-house areas.
Step 1: switch off, cool down and ventilate
Turn the oven off and disconnect it from the power supply where possible. If it is a gas oven, follow the manufacturer’s safety instructions before cleaning. The oven should be warm at most, never hot enough to burn skin or vaporise product unexpectedly.
Open windows or switch on extraction if the room allows it. Professional degreasers need respect: even when used correctly, good ventilation makes the job safer and more comfortable.
Step 2: remove racks, trays and loose residues
Take out racks, trays, guides and removable accessories. Scrape away loose food residues with a suitable non-damaging tool and place accessories in a sink or container where they can soak separately.
This step saves product. If crumbs, carbon and loose fat are removed first, the cleaner can work directly on the bonded grease instead of being wasted on debris that could have been lifted mechanically.
Step 3: choose the right cleaner for the soil level
For light grease, a professional general degreaser may be enough. For dark, sticky or carbonised deposits, use a specific oven cleaner, always respecting the label, dilution, contact time and surface compatibility.
Do not mix products. Never combine degreasers with bleach, descalers, ammonia-based products or disinfectants unless the technical sheet explicitly says so. Mixing chemicals is one of the fastest ways to turn a cleaning task into a safety incident.
Step 4: apply product evenly
Apply the cleaner to the interior walls, door glass and dirty areas, avoiding electrical parts, fans, probes, pilot lights and heating elements unless the product label and appliance manufacturer allow it. Use a controlled amount: the surface should be covered, not flooded.
For vertical walls, foam or gel formats can improve contact time because they run less. On flat removable trays, a liquid or concentrated degreaser can be easier to spread and agitate.
Step 5: allow enough contact time
Most poor results come from wiping too early. Give the cleaner time to soften the grease. For routine oven cleaning this may be a few minutes; for heavier deposits it may take longer, always within the product instructions.
Do not let the product dry on the surface. If it dries, it can leave residues, marks and extra rinsing work. In professional routines, timing matters as much as the product itself.
Step 6: agitate without scratching
Use a sponge, non-scratch pad or soft brush depending on the surface. Avoid metal scourers on enamel, glass and stainless steel finishes unless the manufacturer clearly allows them. Scratches collect grease faster and make the next clean harder.
Pay special attention to corners, door edges, rack supports and the lower part of the oven, where melted fat tends to accumulate. Work from cleaner areas towards dirtier ones so you do not spread heavy grease across the whole surface.
How to clean around the upper heating element
The area around the upper element is usually the most awkward part of oven cleaning. Do not pull, bend or force the element. If it can be lowered for cleaning, follow the appliance manual. If it cannot, use a soft brush and controlled movements to remove loose residue around it.
Apply cleaner only where it can be controlled and rinsed properly. Avoid spraying directly into electrical parts. If carbonised grease is very close to an element or fan, it may be safer to repeat several light cleaning cycles rather than one aggressive attempt.
Step 7: rinse thoroughly
After the grease has loosened, wipe with clean damp cloths until all product residue is removed. Rinsing is not optional: chemical residue can create odours, smoke or contamination when the oven is heated again.
Change rinse water and cloths regularly. If the cloth is saturated with grease, it will only move dirt around. This is where having several clean cleaning cloths saves time.
Step 8: clean racks and accessories separately
Racks, trays and removable guides should be cleaned outside the oven. Soaking helps soften grease, but the solution must match the material. Aluminium, painted parts and some coatings can react badly to very alkaline cleaners.
After soaking, brush, rinse and dry each item fully before putting it back. Wet accessories left inside a closed oven can create odours and spotting.
Step 9: clean the outside, handles and control area
The exterior affects trust immediately. Door glass, handles, knobs, stainless steel fronts and surrounding counters collect fingerprints and grease vapour. Use a suitable degreaser on a cloth rather than spraying directly into controls.
For shiny stainless steel or visible glass, finish with a clean microfibre or PVA cloth. This reduces lint, streaks and the need to repeat the final pass.
Step 10: dry and run a short empty heat cycle
Dry the interior with a clean cloth and leave the door open for a short period. Before cooking again, many kitchens run a short empty heat cycle at moderate temperature to remove any remaining humidity or harmless odour from the cleaning process.
If strong chemical smell remains, stop and rinse again. A properly rinsed oven should not smell aggressively of cleaning product once dry.
Recommended frequencies by type of use
| Environment | Light wipe | Deep clean | Notes |
|---|---|---|---|
| Home kitchen | After spills | Monthly or as needed | Avoid letting sugar and fat burn repeatedly. |
| Office or staff canteen | Weekly | Monthly | Assign responsibility so it does not become nobody’s job. |
| Holiday let | Every turnover | When staining appears | Door glass and smell are part of guest perception. |
| Small hospitality kitchen | Daily surface control | Weekly or fortnightly | Document routine and product use for consistency. |
| Bakery or high-grease cooking | Daily | Weekly | Carbonised residues build up quickly and increase smoke. |
Common mistakes when cleaning ovens
The first mistake is using the strongest product for every situation. Strong cleaners are useful, but using them unnecessarily can increase odour, rinsing time and surface risk.
The second mistake is poor rinsing. If the oven smokes or smells after cleaning, the problem is often residue, not the oven itself.
The third mistake is scratching glass, enamel or stainless steel with the wrong pad. A scratched surface may look clean for one day, but it will trap grease faster afterwards.
The fourth mistake is forgetting seals and hinges. These areas should be wiped carefully, without soaking or pulling the rubber. Damaged seals reduce efficiency and can affect cooking consistency.
Professional checklist for oven cleaning
- Oven switched off, cooled and ventilated.
- Gloves worn before handling chemicals or greasy racks.
- Loose residues removed before applying product.
- Correct cleaner selected for the surface and soil level.
- Contact time respected without allowing product to dry.
- Interior, racks and exterior cleaned as separate tasks.
- All surfaces rinsed until no cleaner residue remains.
- Door glass, handles and controls finished with clean cloths.
- Oven dried and checked before returning to service.
When to avoid cleaning and call technical service
Stop if there is damaged wiring, gas smell, broken glass, detached seals, loose heating elements or repeated smoke that does not correspond to visible grease. Cleaning products solve hygiene and grease problems; they do not repair mechanical or electrical faults.
If a commercial oven has not been maintained for a long time, plan the deep clean outside service hours. Heavy cleaning is slower, messier and more demanding than regular maintenance.
FAQ about oven cleaning
Can I use a normal degreaser inside an oven?
Only if the product label allows that use and the surface is compatible. For baked-on oven grease, a specific oven cleaner is usually more predictable.
Should the oven be hot when I apply cleaner?
No. It should never be dangerously hot. Some products work better on a slightly warm surface, but always follow the label and avoid heat that causes vapour or burns.
How do I remove smell after cleaning?
Rinse again with clean damp cloths, dry the interior and ventilate. If smell remains, product residue is probably still present.
Can I use metal scourers?
Only on surfaces where the manufacturer allows it. On glass, enamel and visible stainless steel, non-scratch pads and soft brushes are safer.
What is the best way to keep an oven clean for longer?
Remove spills before they burn repeatedly, clean racks separately and schedule a light wipe before grease becomes carbonised. Preventive cleaning is cheaper than emergency cleaning.
Conclusion
Knowing how to clean an oven is about method, not brute force. Switch off, remove accessories, choose the correct cleaner, respect contact time, agitate carefully, rinse thoroughly and finish visible surfaces with clean cloths. In professional settings, this routine protects hygiene, reduces odours, improves the appearance of the kitchen and helps equipment work as it should.
Share this content